7.1 Bulk Connect FASTQs
The bulk import feature links multiple samples to their associated FASTQ files simultaneously.
Warning
Sample names must match FASTQ prefix names exactly. A mismatch will cause the INDUCE-seq Analysis to fail.
Steps
- Select Data Registry from the left sidebar.
- Navigate to your sample manifest.
- Select Import, then Bulk Import Sequencing Data.
- Navigate to the folder containing your uploaded FASTQs.
- Select the FASTQ folder to import all FASTQs at once, or hold Shift and select individual files, then select Select.
LatchBio automatically infers potential sample names from FASTQ file name
components. Components are divided by separators including underscores (_),
hyphens (-), and periods (.).
!!! note
For example, EPplus_24h_rep3.R1.fastq.gz contains 11 name components. It is
strongly recommended to modify detected names to ensure they match your
sample manifest.
- Select Modify Name Parsing, then Specify Manually. Choose one of the following approaches based on your file naming convention:
- In Specify Manually, select the number of FASTQ file name components to include. LatchBio shortens all file names to the same number of components.
- Review the new sample ID.
- Select Confirm.
- In Specify Manually, enable the Use Regex option.
- Enter a regular expression matching your naming convention. For example,
^[^.]+captures all characters up to but not including the first period:sample1-4hr_rep1.fastq.gz→sample1-4hr_rep1. - Select Confirm.
!!! note Contact BSB Technical Support for assistance with complex regex patterns.
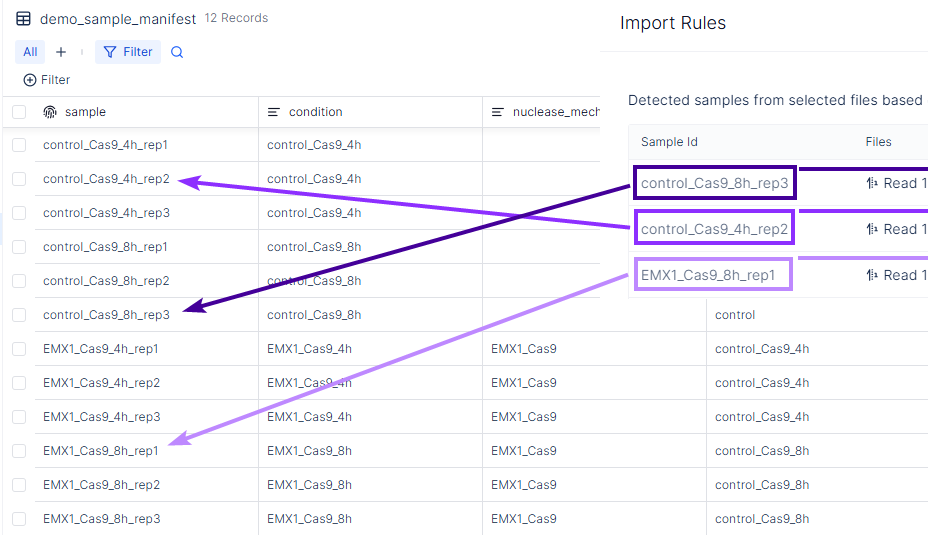
- Verify that each File is correctly associated with its Sample Id.

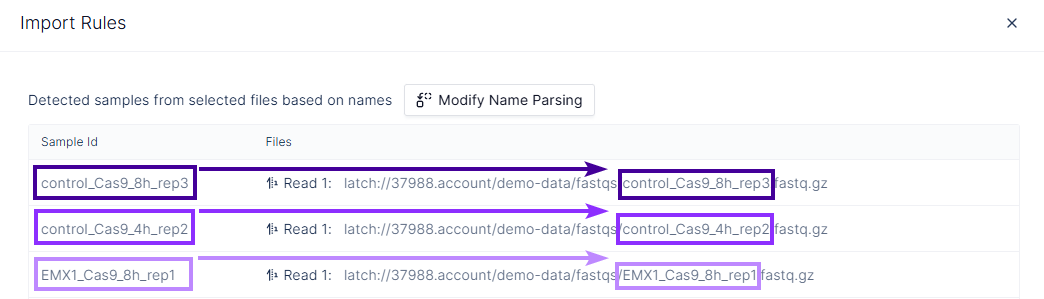
- Confirm the resulting Sample Id values match the
samplecolumn in your sample manifest registry table.
-
Select Next.
-
Enable the Left Join option. This ensures only FASTQs with sample names matching entries in the sample manifest are returned.
-
Select
fastq_1from the Target Column for Read 1 dropdown. -
For paired-end sequencing, select
fastq_2from the Target Column for Read 2 dropdown. For single-end sequencing, disable Target Column for Read 2. -
Select Import.
To edit an individual FASTQ file path after bulk import, see Manual Connect.