8.1 Set Up Executions
Steps
-
Select Workflows from the left sidebar, then select INDUCE-seq.
-
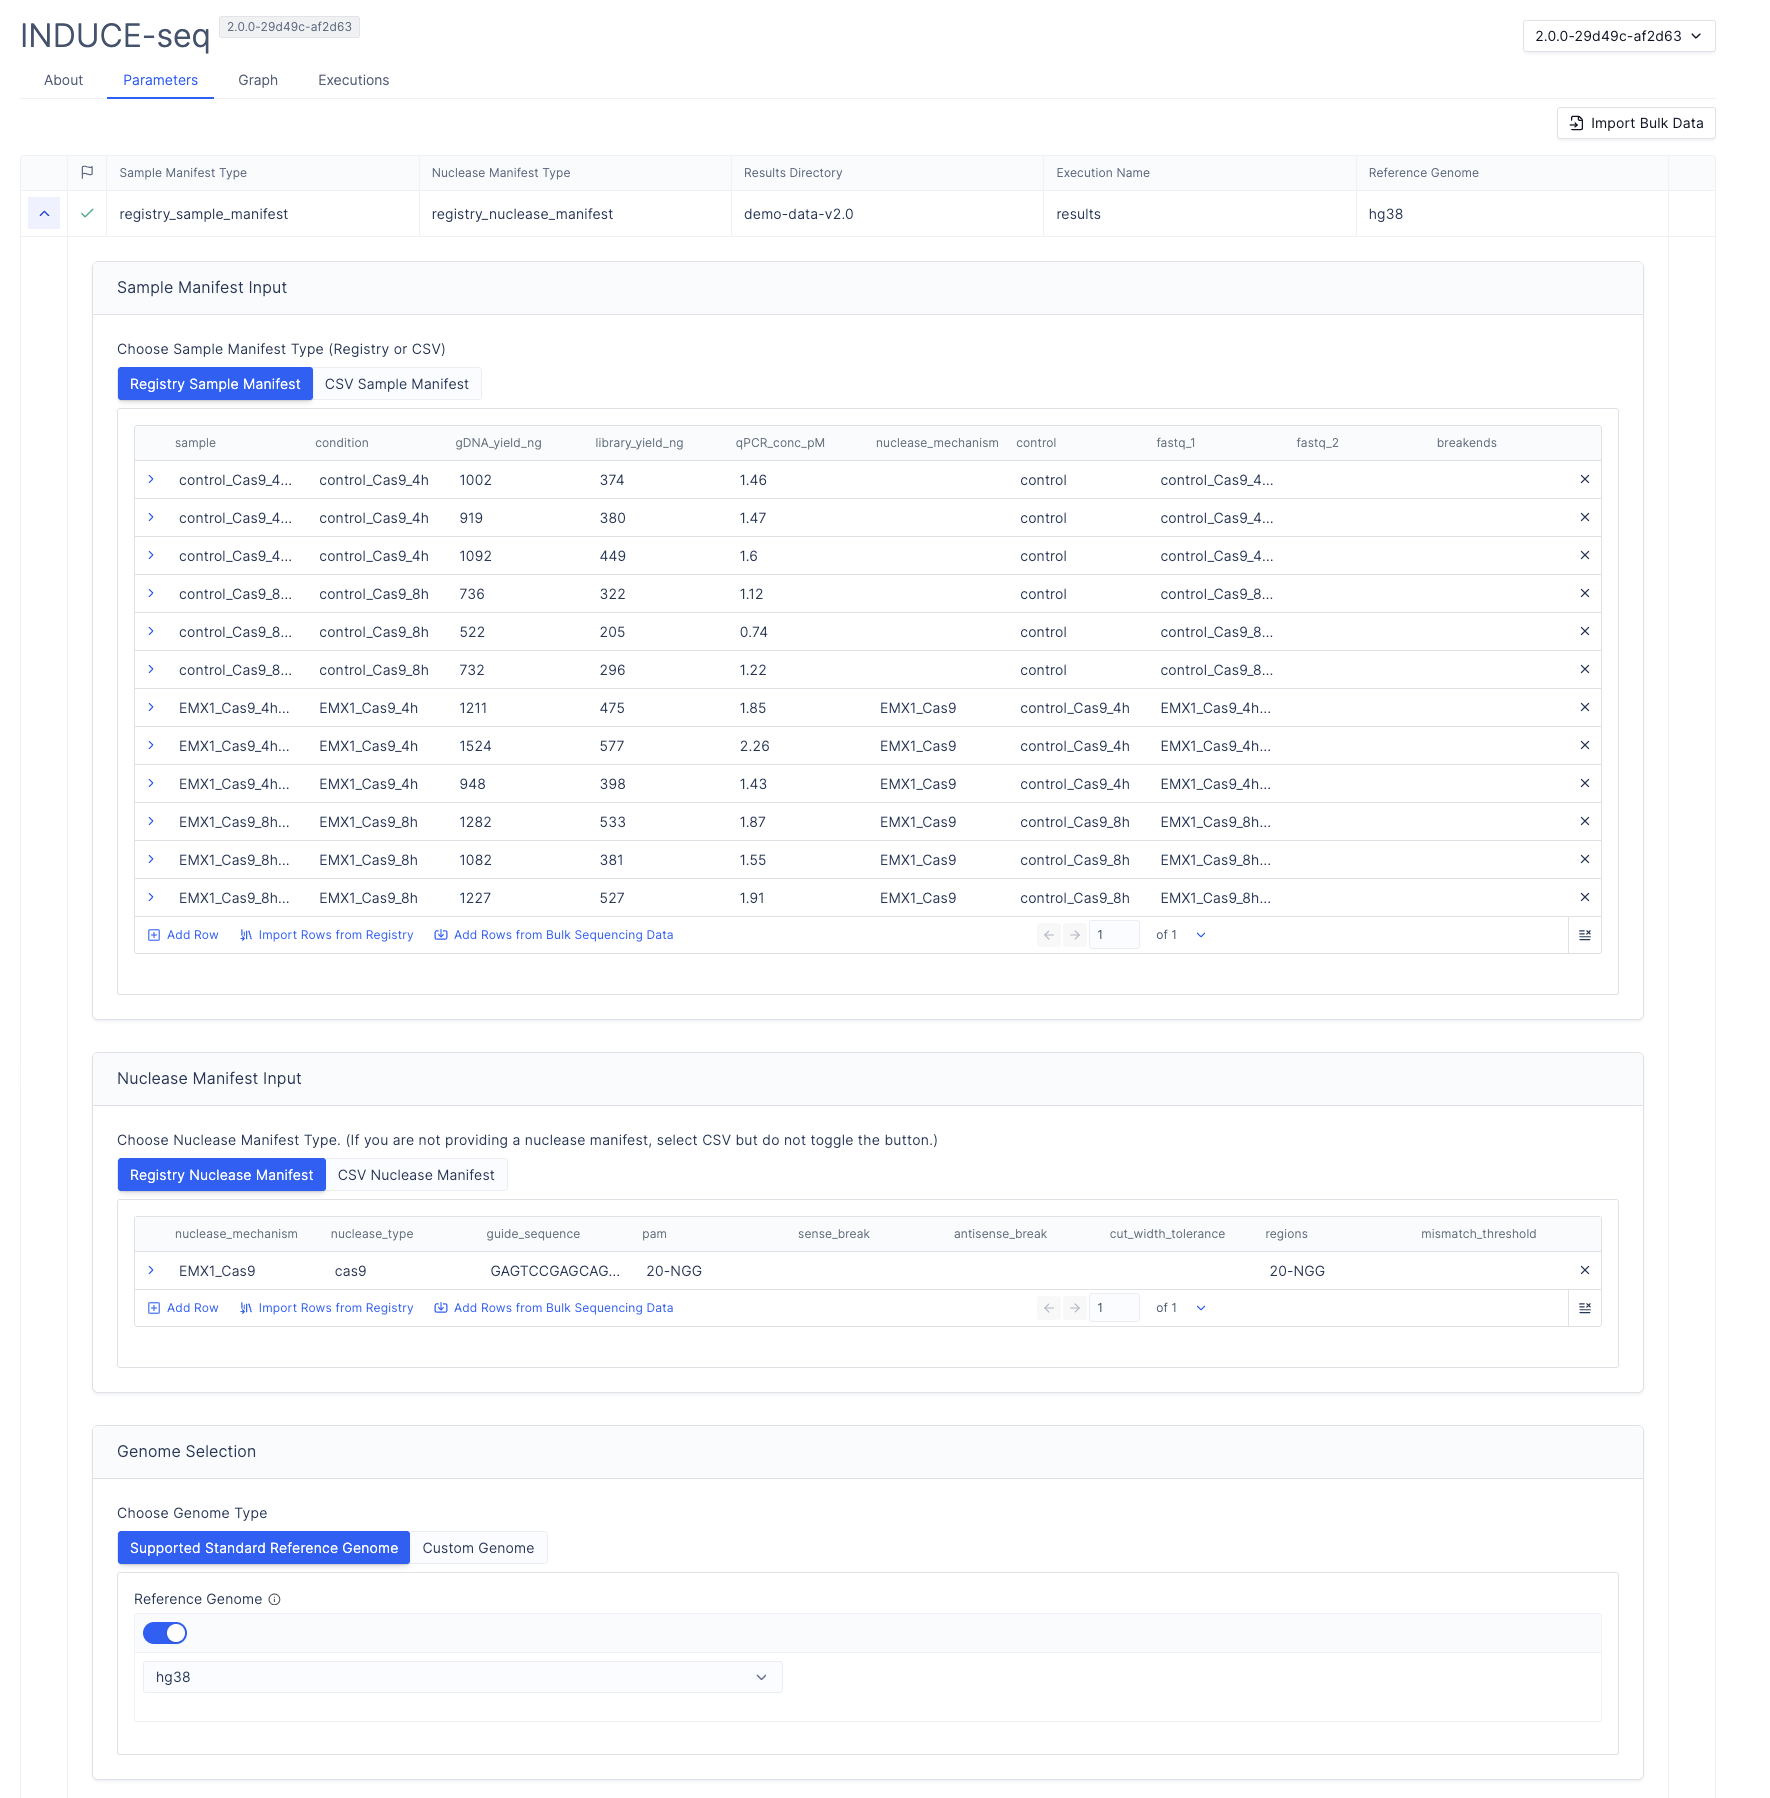
Under Sample Manifest Input, configure the sample manifest:
- Under Sample Manifest Type, select Registry Sample Manifest, then Import Rows from Registry.
- Navigate to your sample manifest, then select Next.
- Select the samples to include in the run, then select Next. Use the checkbox
to the left of the
samplecolumn to select all samples. - Confirm that the workflow parameter column names match the sample manifest column names.
- Select Import.
-
Under Nuclease Manifest Input, configure the nuclease manifest:
- Under Nuclease Manifest Type, select Registry Nuclease Manifest, then Import Rows from Registry.
- Navigate to your nuclease manifest, then select Next.
- Select the nuclease mechanisms to include, then select Next.
- Confirm that the workflow parameter column names match the nuclease manifest column names.
- Select Import.
-
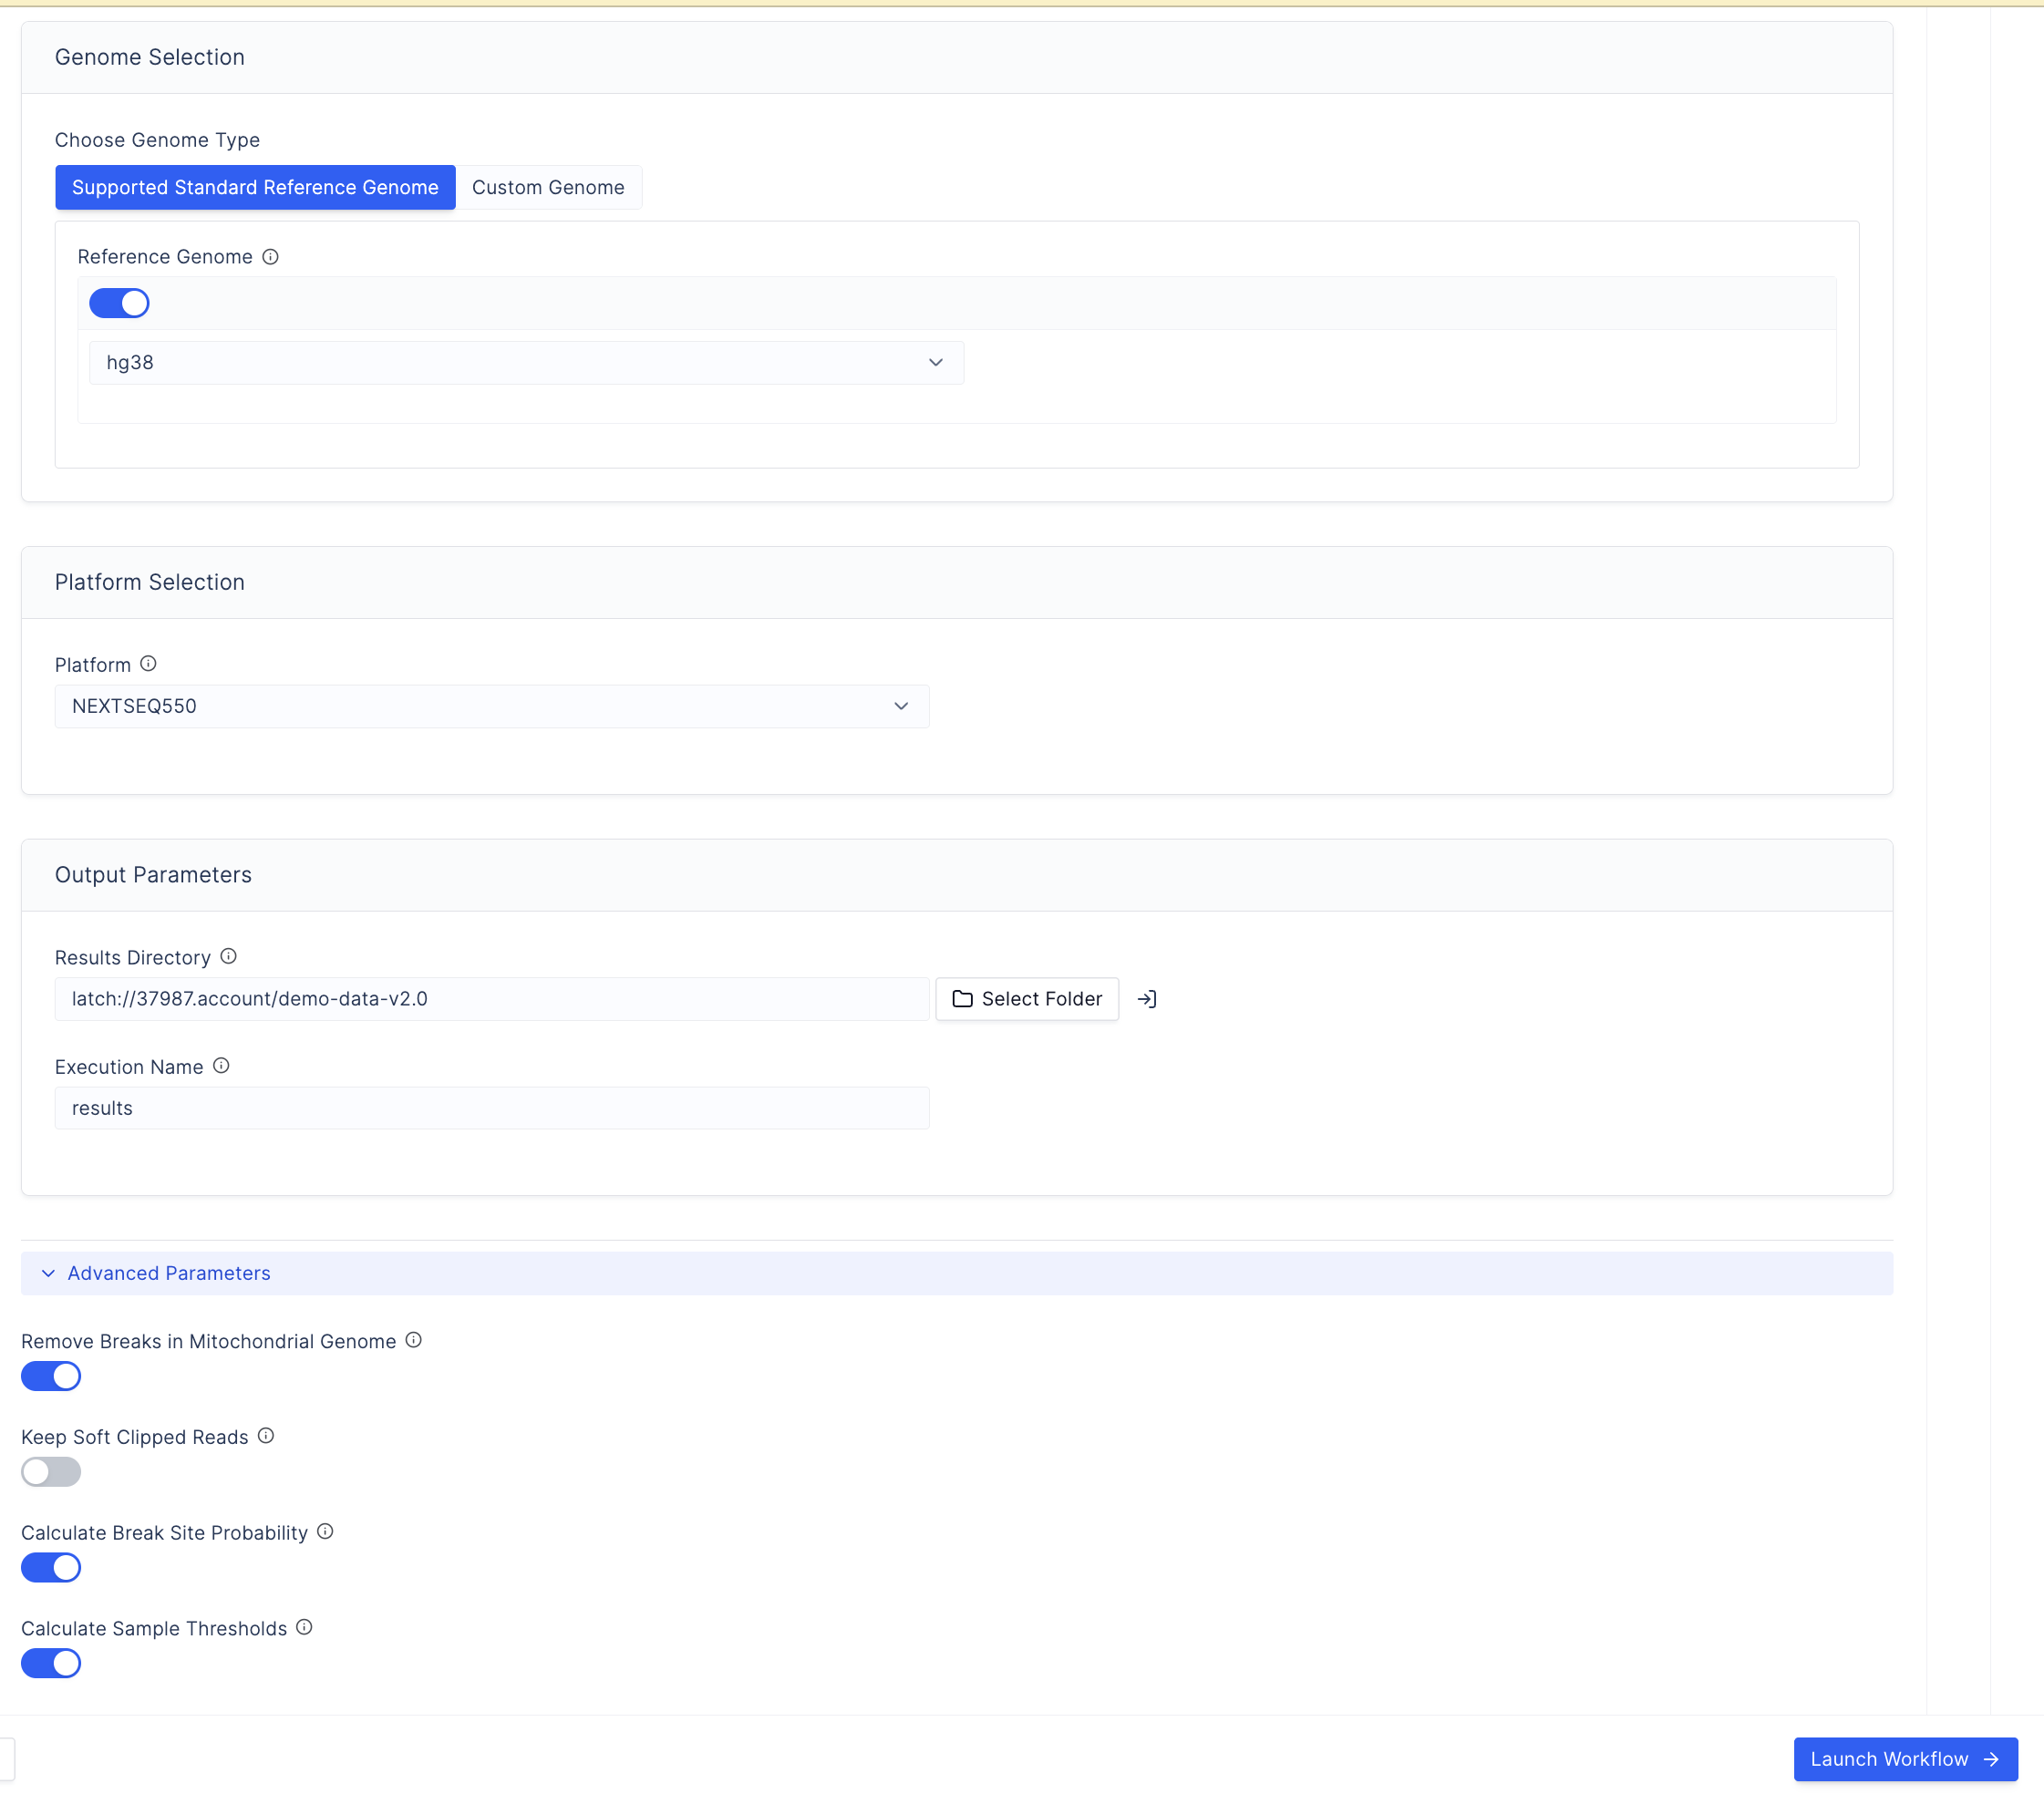
Select the sequencing platform used for the sequencing run.
-
Select a reference genome:
Toggle the button and select from
hg19,hg38, ort2t.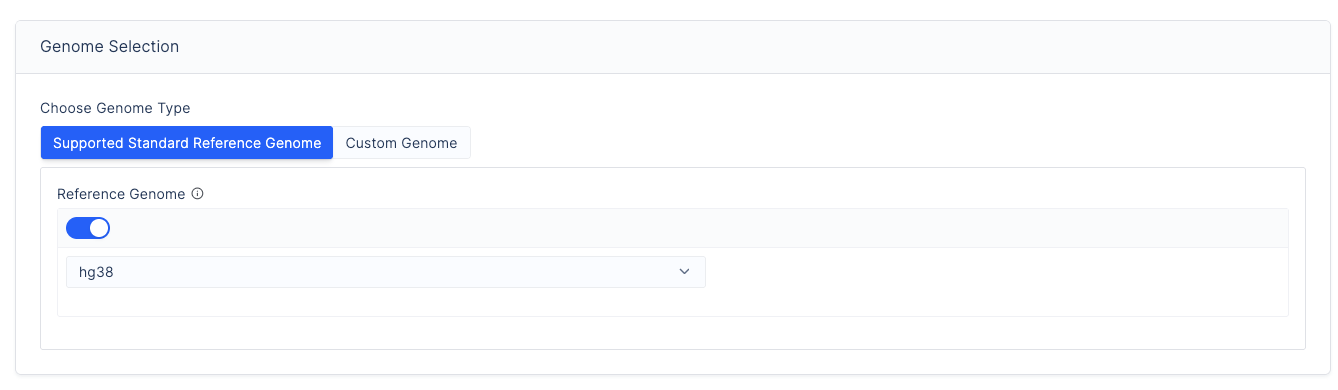
Upload the following files to the LatchBio Data tab before proceeding (mounting an AWS or GCP bucket is recommended):
File Format Required? BWA Index Directory Directory containing the genome indexed with bwa indexRequired Custom genome sequence FASTA format Required Chromosome Sizes BED file: chr.. 0 chromosome_lengthRequired Gene Annotations BED file: chr.. start end gene_nameOptional Repeat Mask BED file: chr.. start end repeat_nameOptional Exclude List BED file: chr.. start end— must have suffix.excludelist.bedOptional Warning
Contig names in the genome must start with
chr.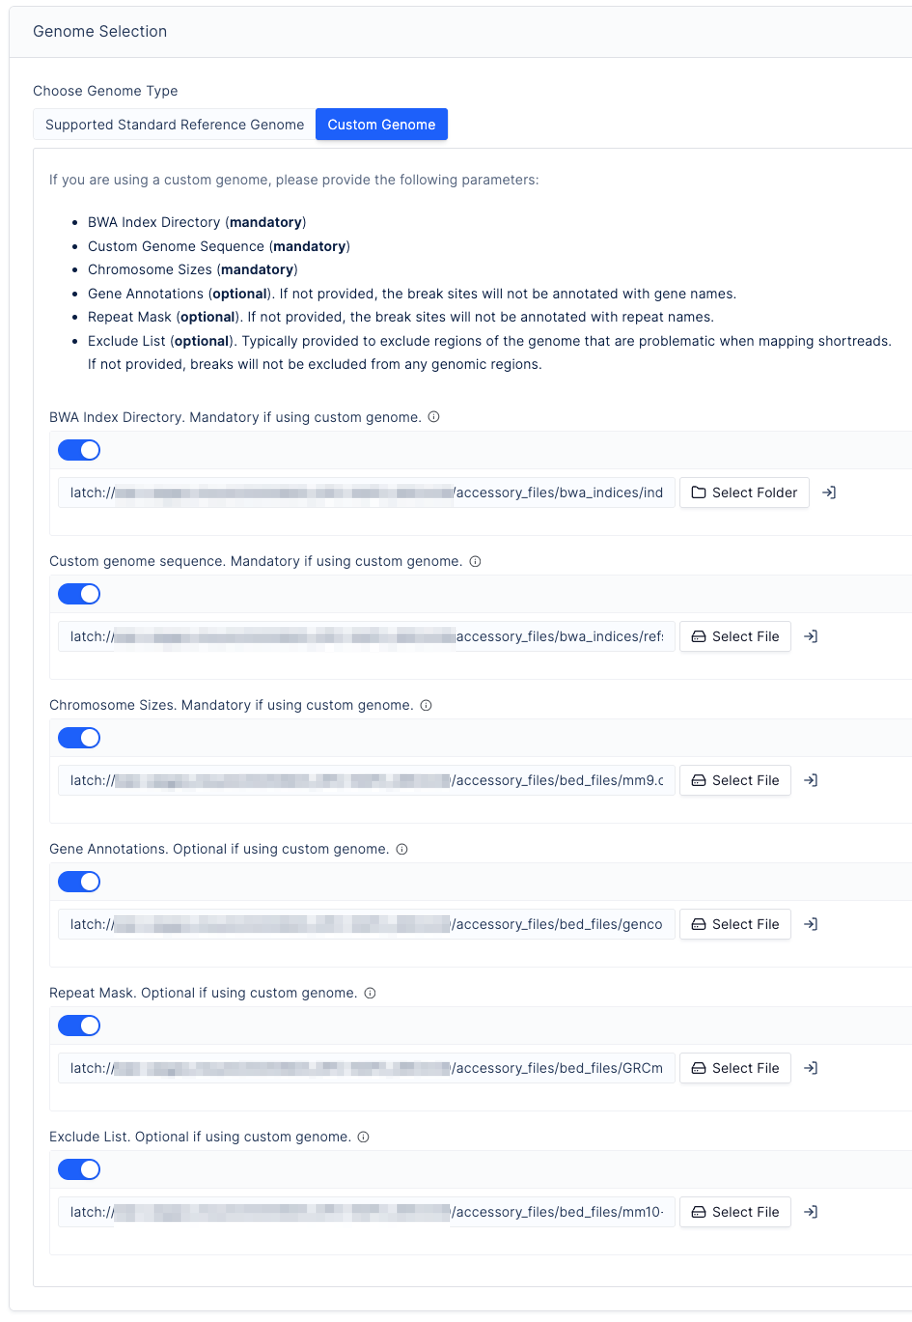
-
Under Output Parameters, select Select Folder and choose an output folder for results. For recommended folder organisation, see Example Folder Structure.
-
Enter an execution name. Only alphanumeric characters, underscores (
_), and hyphens (-) are permitted. Date and time are added automatically. -
Configure Advanced Parameters (optional):
Read Filtering
- Minimum read threshold: Minimum number of reads required for inclusion in downstream analysis.
- MAPQ threshold: Default removes reads with MAPQ below 30. Can be lowered to retain reads in repetitive regions where MAPQ values may fall below the default. Lowering below the default is generally not recommended as it increases false-positive risk.
ExAmp / Optical Duplicate Parameters
- Duplicate detection distance: Detection distances have been increased to
match the NextSeq 2000 flow cell characteristics. Override with
clumpify_dupedistandmarkdup_distparameters if required. - ExAmp duplicate filtering: Optional step to increase ExAmp duplicate artefact removal stringency. Non-reproducible single-stranded sites are excluded by default when enabled. The minimum break count for site removal at this step is configurable (default: 5).
-
Select Launch Workflow to start the run.